Wednesday, March 30, 2011

Pig Cake


The Pioneer Woman is my hero.  Ree is the ultimate blogger, photographer, mom, chef....I could keep going so lets just say ultimate WOMAN! Her posts are beautiful and her recipes divine!  I almost find myself not wanting to share her with you.  I want to keep her my little secret...but you are sure to find her no matter how hard I try.  I was supposed to bring a dessert to dinner at church tonight and couldn't decide what to make.  I ventured over to http://thepioneerwoman.com/ and wouldn't you know she had just the thing.  Even talks about pot lucks and church in the same post.  I think she read my mind.  And as if I even have to tell you...the cake was a hit at church! 

I won't keep you any longer...here's her recipe.  Of course over on Ree's site you can find her step by step instructions, all in beautiful pictures.  Its much more exciting to see a recipe that way! And I have no idea why its called pig cake ....Pioneer Woman, Ree

Pig Cake 


Ingredients

FOR THE CAKE:
  • 1 box (18.25 Oz. Box) Yellow Cake Mix
  • 1 stick Margarine (softened)
  • 1 can (14 Oz. Can) Mandarin Oranges, Drained, 1/2 Cup Juice Reserved
  • 4 whole Eggs
  • 1 teaspoon Vanilla Extract

FOR THE TOPPING:
  • 1 package (4 Oz. Box) Vanilla Instant Pudding Mix
  • 1 can (20 Oz. Can) Crushed Pineapple, Juice Reserved
  • ½ cups Powdered Sugar
  • 4 ounces, fluid Frozen Whipped Topping (such As Cool Whip)
  • Extra Mandarin Orange Slices, For Garnish

Preparation Instructions

Preheat oven to 350 degrees. For the cake, combine cake mix, margarine, 1/2 cup juice from the mandarin oranges, eggs, and vanilla. Beat for four minutes on medium-high. Add drained oranges and beat again until pieces are broken up and small. Pour batter into greased and floured 9 x 13 inch baking pan and bake for 25 to 30 minutes, or until golden brown and set. Remove from oven and cool completely. If desired, turn out cake onto a large platter.
Once cake is cool, blend juice from drained pineapples with the vanilla pudding mix. Add powdered sugar and mix, then mix in whipped topping. Stir in drained pineapple. Spread on cooled cake and refrigerate several hours.
To serve, cut cake into squares and top each square with a mandarin orange slice.

Thank you Ree @ The Pioneer Woman

Etsy Store Review - jeantofashion

I LOVE Etsy.com

What Is Etsy? 
Here's what they say on their site:

Our mission is to enable people to make a living making things, and to reconnect makers with buyers.
Our vision is to build a new economy and present a better choice: Buy, Sell, and Live Handmade. 


I spend a lot of time on Etsy. I window shop on Etsy. I've made a few purchases on Etsy.  If I made items, I'd sell them on Etsy.  I've suggested Etsy to many friends.  Today, I felt inspired to post a review from a recent purchase I made on Etsy. 

Enter
Jeantofashion Designs!

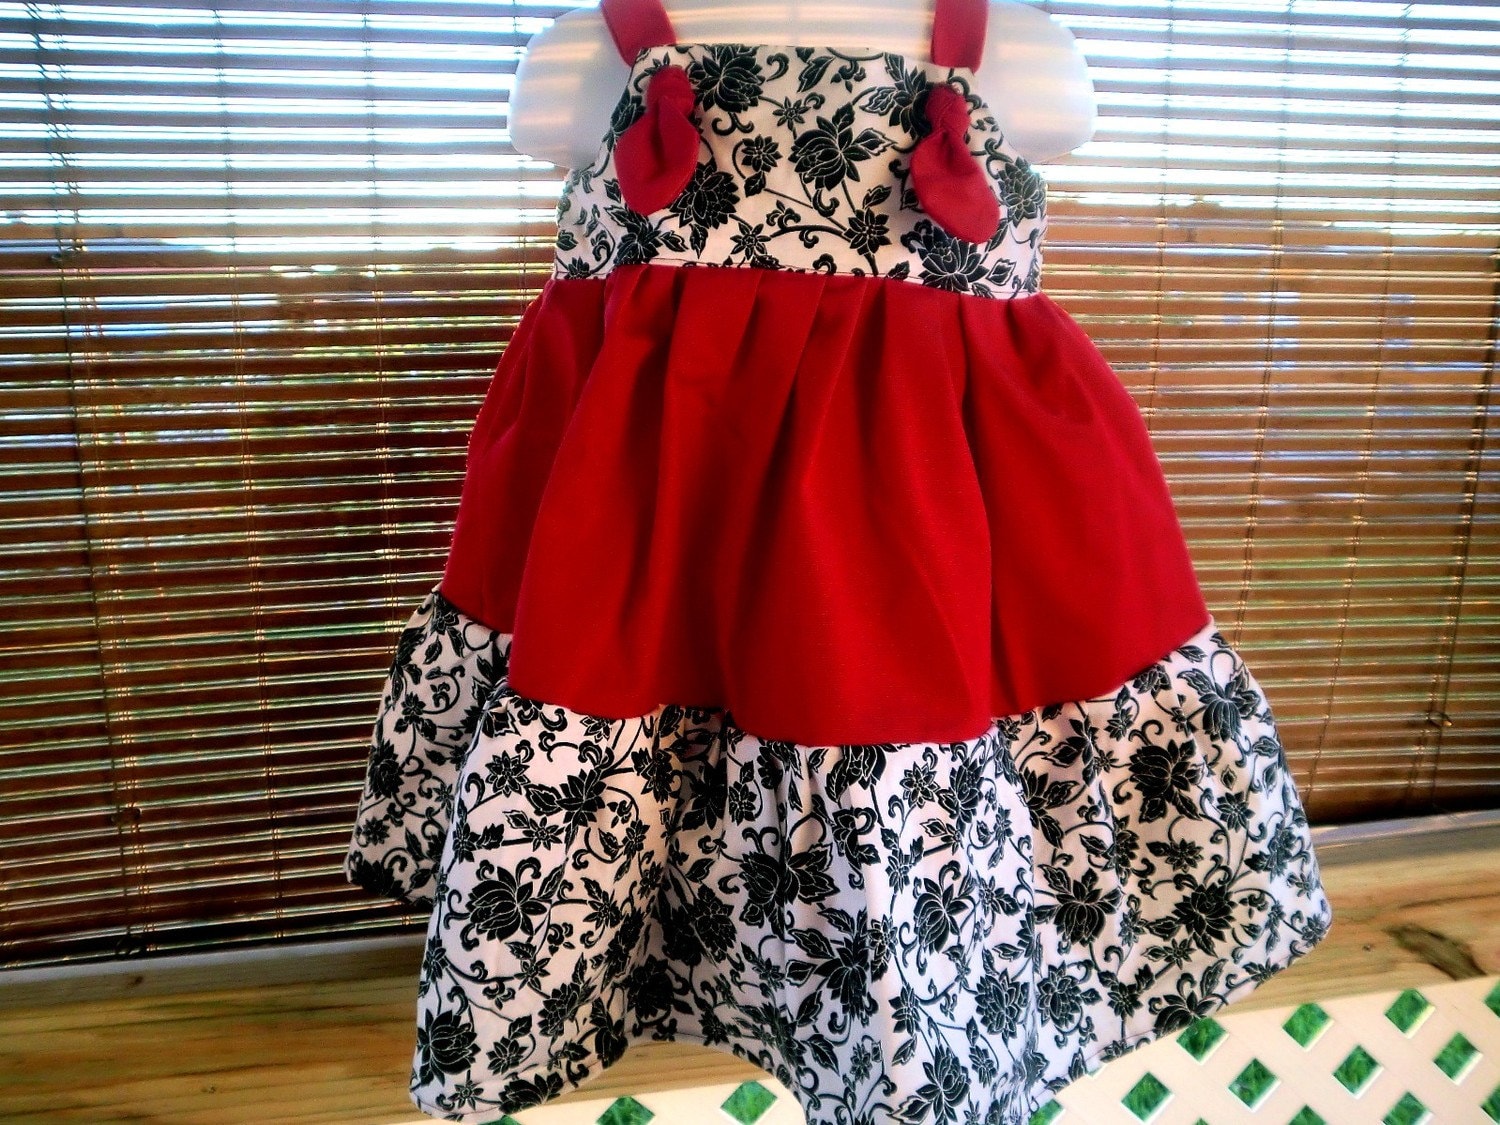
I came upon these adorable Knot dresses...

And thus began my search....and I didn't search long before I came upon this one!

Black and Red...Reminds me of a lady bug.. Lil Bug is all Ladybug! She has a lot of ladybug clothes, and her room is decorated with ladybugs.  I think this one's perfect!

My order came today and I was quite impressed with the packaging!  Jeantofashion designs put a whole lot of effort into their item without adding a whole lot of padding to the retail price!


I love the dress!  Its adorable and well made! Thank you Jeantofashion!
See more of the store's items here: 
JeantoFashion


Thursday, March 24, 2011

Spring Cleaning!

As much as I love spring...I don't love "Spring Cleaning" at all.  That's why I think the Spring Cleaning Event I joined over at Ask Anna will make it a bit fun.  It starts April 2nd, so I have some time to prepare myself for such an event.  And it ends just before my son is out of school for spring break.  Hopefully, all my Spring Cleaning will be complete and I can enjoy some time with him instead of time with the floors, counters, bathrooms, etc. 

So, while we are on the topic of cleaning...did you know your washer had a filter? I certainly did not!  Check out Anna's post on the fluff the washer leaves on clothes and how to get rid of it!

Saturday, March 19, 2011

Time for a Spring Wreath

I have been searching and searching for inspiration to make a spring wreath for my front door.  So many to choose from - I may make more than one! One for the door, one for the window, one to hang over a mirror... you get my drift.
 Maybe you need some inspiration as well?  Here's what's on my list:
I am loving these wreaths made from coffee filters! We have a Tassimo coffee maker, so coffee filters are a thing of the past for us! I still have quite a few that I saved for that "one day" project.  I thought it might be a kids craft...but maybe mom will use them this go around.

Find these beautiful wreaths...and a tutorial or two here:
The Nester
Freedom Divine

I have a ton of Spanish Moss in my backyard.  I've read a bit on how to dry it out so you can use it in projects such as these spanish moss wreaths.  Maybe its time to put that to work! 

The spanish moss wreaths were made by
Our Daily Chocolate and the other by Lindsay at Living With Lindsay.

I love the square wreath because of its shape. 
Delia Creates shares it on her blog.

The paper rosette has to be one of my favorites not only because it's so shabby chic, but because I recognize how much time went into that one.  I've made the rosettes before, and making each individual one takes time...and to have enough for a wreath...WOW!  Hats off to Stephanie Lynn at
Under the Table and Dreaming!

What's on your front door?

Wednesday, March 16, 2011

I do sew, I just practice avoidance of sewing.

Well, I guess I have an apology to make.  To everyone whom I have told "I don't sew", I am sorry.  I do.  I have although, for years, practiced a strong avoidance of the word sew and all that goes with it. 
I love fabric!  LOVE it!  I have a bin full of fabric. 
In high school home economics, I made a baby blanket.  That was all. 
Fast forward to my 20's, after child #1 was born...I was given a sewing machine by my dear grandmother, aka Nanny.  She was determined that I would learn to use it while she remained on this earth.  She showed me how to thread it, how to fill the bobbin, and how to make adjustments as needed for fabric thickness.  I made a few things here and there, hemmed some pants, fixed a hole or two.  However, I could never sew straight lines.  And I am not a measuring kind of gal (I don't measure when I cook, when I bake, when I craft...) so sewing and I don't see eye to eye on most things.  After a few projects gone wrong, I stopped sewing. 
The sewing machine Nanny gave me remained in my possession.  I couldn't dare give it up for the mere fact that one day I was gonna sew.  Recently, I have been in awe of the sewing projects I see in blog world.  All my blogging friends are sewing, why wasn't I?  Because I don't measure.  I hate measuring! (My a-ha moment) It's not the sewing...its the measuring!! 
Back to my bin of fabric....I have a bin full of fabric.  A few months ago, after seeing a link party on pillows, I got a hankering for new pillows.  I can't believe the price of pillows! My thriftiness kicked in and the crafting began.  I made new pillow covers for my existing pillows on my couch with my basic sewing skills. 
Then I moved on to curtains.  I bought the fabric after not finding what I wanted or was willing to pay for curtains in the store.  I was shopping at Old Time Pottery for curtains, and came across their fabric selection.  They had exactly what I wanted in the colors I wanted... but it meant me sewing them into curtains.  Hmmmmmm......
Isn't the fabric adorable?  Perfect for boys room!
After searching the WWW for handmade curtains and in awe of what people have done...I decided I best stick with the basics and avoid all that measuring!
I had two fabric designs.  Yards of dots and yards of stripes.  I bought both not knowing yet what I was going to do. 

The dots were just short of a full pair of panels.  I knew I was getting in deep when I decided I would have to add the striped fabric to make the dot fabric long enough.  It was quite easy, and I just matched one panel to the other to ensure they came out the same size.  The horizontal stripes made it easy to match up sizes and also sew straight lines!  I know that's what the guard lines on the machine are for ...and you are itching to tell me that I could have measured them the same size....RIGHT?  yeah yeah
I left them unhemmed until the rod was up and I could hang them.  I had to test it to decided if I wanted them to go to the floor or just the bottom of the window.  When making that decision, I also decided they needed stripes at the bottom.  OH NO!  That might be pushing the sewing skills
Well there they are, finished and hung.  I like them.  I like them alot.  And I made them with a sewing machine.  I'm on a roll now...but first I must seek a little boy out for the cleaning of his room.  Hanging the curtains was tough as I kept stepping or tripping over toys and clothes and cords and stuffed animals...oh my!

Linked up @


monogram

Wednesday, March 9, 2011

PC Troubles behind us and a recipe

I finally have a new computer!  After weeks of frustrations we finally bought a new one.  While I was away, I worked on recipes to share, made curtains (not yet hung) for J's room, started the Soccer mom season, and watched a whole heck of a lot of Blue's Clues (Bug's current favorite). 


Enough about what I've been doing and on to recipes. I vow to only share recipes that I have actually tried and in most cases tweaked a bit.  I typically won't share a recipe until its deposited into the tried and true recipe folder.  This way, I know and you know its a good one!


French Dips are requested by my family most often.  Everyone loves to dip them and I have no problems making them because it is so easy. 


                                                           Here's a printable recipe card.

                                                          you will need:  
                                                         3 tbsp. butter
                                                      large onion, sliced
                                                           2 tbsp. flour
                                                     1/4 cup dry Sherry
                                                       2 cans beef broth
                                                     Everglades seasoning
                                            (or grill seasoning, or salt/pepper)
                                      Deli sliced Roast Beef (we use Boar's Head)
                                                     Deli sliced Provolone
                                               French Bread Sandwich Rolls
                                                                Mayo

 
Sauté sliced onion in butter until soft. 
Sprinkle in flour and cook for 1 minute. 
Add dry sherry, stir.  Add beef broth, stir. 
Bring to simmer and reduce heat. 
Lay meat slices across cutting board. 
Sprinkle seasoning over each piece and add to broth. 
Allow to heat through for a couple minutes. 
(Do not leave in hot broth too long, beef will harden. )
Open rolls, add mayo to both insides. Top with cheese. 
Add hot beef slices on top of cheese.
Spoon broth into small dishes for dipping your sandwich in!
Related Posts Plugin for WordPress, Blogger...