Tuesday, April 26, 2011

National Teacher Appreciation week is May 2 thru May 6th

Teacher Appreciation week is approaching as well as the end of school year.  Summer is bittersweet for me...no more schedules, no more making it to the bus on time, BUT that means a young one always underfoot, even during nap time!  Nope, not getting J to go back to taking naps.  That means I must come up with a summer learning program for him...but that's another post. 

Back to Teacher Appreciation...I've seen some really GREAT ideas in blog land.  I've chosen a few that would be quick and easy to share with you. 

Add an Itunes Gift card to this cute FREE printable:

Click here to print this, and check out the other Teacher ideas. 

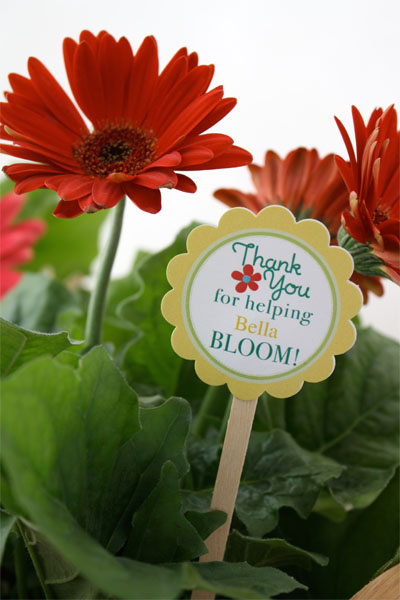
Add a Starbucks to this Free printable!

 Click here to get print.
Click here to get this editable Bloom!

Monday, April 25, 2011

Smeeps! Using up the Easter Candy

We had a wonderful Easter and as a result have a bit of Easter treats floating around the house.  The kids and I made Peeps treat bags for the church Easter Egg Hunt.
Here are the ones we had leftover.
We printed the Peeps treats bag topper for FREE @ eighteen25

Inspired by an idea I saw here, I decided to rid ourselves  use up some of our leftover Peeps by creating S'meeps! (aka S'mores with peeps)

You will need:
Graham Crackers
Chocolate
Peeps

We placed a square of chocolate on a graham cracker square, topped it with a peep, and turned the Toaster oven on Broil.
poor lil' Peeps!

Once the Peeps melted and began to roast (turn slightly brown) we pulled out and smashed another Graham cracker square on top. 
 
Pink peeps!

Enjoy!
CAUTION!  Allow S'meeps to cool slightly before biting into the melted chocolate goo! That goo is HOT!


Linked up:

Mouthwatering Mondays

BOGO Lipton Iced Tea


Head on over to Lipton Facebook page and Like them for a printable Buy 1 Get 1 FREE coupon!  Grab it now before it disappears!

Monday, April 18, 2011

Spring Wreath...Finally


I finally made it to my wreath!  I posted a while back (check it out here) a roundup of some of my favorite wreaths around blogland.  It took a while, but I was able to finally make mine last week, and got it hung today!
I started with a square piece of cardboard, cut from a box.  I know I took a picture of it, but I think my camera ate the file.  (Actually, I may have not had the memory card in the camera, but the camera ate it is my story and I am sticking to it) Armed with my favorite crafting tool, my handy dandy glue gun, I went to work attaching coffee filters. 


About halfway through, I realized I should have covered the back with something to hide the cardboard.  So I added some pretty paper to the back.
Once the square was covered in coffee filters I went to work on paper flowers. I chose a rolled paper flower, but if you search google images for "paper flowers" you will be overwhelmed by the amount of tutorials!  I went with quick and easy. 


I added some silk leaves I just happened to have on hand from a silk flower arrangement I just completed.  It was still missing a little something, so I decided to add birds.  I am fascinated with all the bird stuff out right now! 

I printed out a template from
Lolly Chops and again went with cardboard as the base.  I then Mod Podged the paper onto the bird...added buttons for eyes, ribbon for tails...and DONE! 


Linked up!
monogramTip Junkie handmade projects
Get Your Craft On Tuesday

Wednesday, April 13, 2011

My Party was Featured!

A party I assited in putting together was featured today onCelebrations of Houston
Queen for a day!  Click Here to see full feature!

Free 8X10 Canvas

The Canvas People are at it again!  You can score a free 8x10 Canvas or $50 towards another size Canvas (pay S&H)  Its so simple to create a canvas if you have a picture ready to upload!  My problem is picking that picture!

I think I will be ordering another Canvas, I need one more to complete my wall of the kiddos.
I lack a large canvas of J. 


So many decisions!


Spring Cleaning Day 5 - Walls, Baseboards, Doors


 It's time to wash the walls!  That's what I've been doing today...wiping down the walls and painting.  Why is it that little hands must touch every corner they turn?  I think I scrubbed more corners today than actual walls. 
Can you see that little handprint?  That would be a Bug print. 
I got out the white paint to begin some touch ups, starting with the stairs.
I mean really...how do finger prints (that won't wipe away) get on the riser?

Since I had it out, I painted Bug's door.  It was a slavaged door that has waited a year to be painted.
 
It's drying now and may need another coat.
With little ones, I am always wiping down walls.  Corners are magnets for little hands.  And the wall space under the bar...constantly cleaning there!
  Since I was on a roll with the walls and baseboards, I took my cleaning wipes to the banister and each spindle got a wipe down.  Lots of Bug prints there, I could track her every move on the stairs...
Happy Cleaning!
Photobucket

Monday, April 11, 2011

Spring Cleaning Day 4 - Windows

 Task for Day 4 is windows.  Not just Windex and paper towel cleaning of the windows...but soapy water and squeegee cleaning.  I am half and half on this task.  Half of my windows have nifty tabs that allow me to tilt the window in.  This is such a nice feature...I am able to get areas I can't get to on the windows that don't tilt in. 

I love how clean the tracks look now! The picture above only shows how the window tilts out and doesn't capture how squeaky clean that trim is...outside and in! I should have taken pics at night so you could see it in all its glory.  I also have to admit...our landlord sends someone to clean our windows yearly. That time is now and I couldn't be happier!  Its perfect timing!  When you see the picture below you will understand why its worth it

to have someone clean the windows...

...look at all those windows!  And that's just the back of the house!  I almost live in a glass house.  I can't even reach to the top of the bottom row of windows! We lack a really really tall ladder or scaffolding required to reach the top levels of windows.  Thank goodness for fantastic landlords!

What's your window situation?

Photobucket

Friday, April 8, 2011

Easter then Spring Printables

I adore printables!  They are such an easy decoration for your home or party.  You can print them out at home and immediately frame them for instant decor.

I do sometimes, opt to upload to a printing website and have them printed on photo paper. 
Arts Cow is my favorite for the price...and tons of free stuff (pay S&H).  Like right now, everyone I refer to Arts Cow  will get 1200 free prints credits & 3 8"x8" photo books & other great photo gifts credits!  So go ahead and sign up! 
What I love about these, is that I can change my decor frequently without hitting the checkbook.  I just print out and replace the old printable with the new one!  So, here are a couple Easter prints that are free to you. 

Easter Printables: 


Easter Subway Art from Lolly Jane Boutique
Photobucket
My Redeemer Lives Egg from A Little Tipsy


When Easter is over, and the eggs have been hunted you will want to change out your Easter decor to some Spring items.  Since you didn't spend a whole lot of cents on the Easter printables, you can quickly change to these Spring printables!


Less Cake More Frosting made this great Daisy print!


Spring has Sprung from Itsy Bitsy Paper


This looks like an expensive print I've seen in stores!  I'd use this as year long decor!
Our Humble Abowed

Happy Decorating!

Spring Cleaning Day 3 - Vents

 Day 3 is about the air vents in my home.  I have to admit that we are pretty good about keeping the intake vents clean.  Anytime I have the vacuum out around one, I vacuum the dust away.  Depending on how bad it is, I may open it and get inside to.  The outgoing vents...I get those when I get the fans (every few months).  However, I have never taken them down and washed them.  In our current house, 80% of the outgoing vents will have to be taken down by someone with and brave enough to climb a really really tall ladder.  I can reach some from upstairs with my vacuum hose extended, but as fas as getting a screw driver up there....I think not.  Here's a look at one of the intakes I tackled today.  I vacuumed it first, then got the q-tips out. 

Before

After

 The last time I dealt with ceiling vents, I broke a globe light hanging next to the vent I was getting at.  It shattered all over my face!  Thank you Lord I only received a minor scratch across my chin.  It could have been really bad for my eyes. 

Doing this reminded me of something I think very few people know to do.  Go take the cover off your thermostat, so you can see the inside parts.  Go on, I will wait.
 To the left is mine, before cleaning it.  It looks pretty good now, but you should have seen that bad boy the first time I ever opened it up! WHOO!  If only I had taken pics! I have two in my house...one old style.  The other is modernized and the inside doesn't look quite the same.  Awhile back we had two of these older style thermostats.  One (which is now modernized) was giving us problems.  My brother showed me how dust gets on the glass covering the mercury.  That dust is heavy to the "oh so sensitve" mechanics.  It can weight it to one side, giving your thermostat an incorrect reading, keeping your heat/air on longer than it should....raising your electric bill, or in our case, ruining the thermostat.  We eventually had to have that one replaced. 
So, I highly suggest getting out the Q-tips and cleaning yours periodically. There are a lot of holes for dust to make a home in.   Here's mine spic and span! 

Happy Cleaning!
Photobucket


Tuesday, April 5, 2011

Spring Cleaning Day 2 - Dusting

Photobucket

Today Anna has us dusting.  Fans...I have many.  Many fans I have need dusting.  I have dusted many fans...and thank goodness I started last week!  Little did I know this would be on the list.  Guess I should have known, but it didn't cross my mind.  So the fans in the master bedroom and bath (yes there is a fan in the bathroom!) were done last week. 

Cabinets...oh boy!  That is not a favorite of mine.  I used a mixture of equal parts water,  vinegar, and Murphys Oil Soap on my floors and cabinets. (Mix directly in spray bottle and keep on hand)  It does a great job at breaking up the grime and the Murphy's leaves a nice shine. 

Get a Coupon here!

I didn't realize how bad my cabinets were.  Its amazing how dirty they get around the handle.  My vinegar mix got it right off!  They shine now!
Picture taken with IPhone

Now...back to the fans.  I did not get to the fan in Bug's room as she was napping when I was attacking the fans.  I began a good work on this one, in the kitchen (yes, there is a fan in the kitchen too!).

Picture taken with IPhone


This is one mean fan to clean.  It looks nice and clean from this angle.  The top of the blades are a different story.  The top of the blades are sticky.  I am not sure why, maybe being in the kitchen?  Maybe the people before us failed to tell us about the slime wars that took place here.  I am not real sure of the why, but I know its sticky...and the dust is stuck to the sticky.  My magic vinegar mix was not magic enough.  Hubby is going to take down the blades so I can take them outside and scrub them.  The swinging action that started while I was attempting to scrub the top was quite scary.  Best take down the blades from the swinging fan huh?  Saving for the weekend....

Monday, April 4, 2011

DIY Tiered Jewelry Holder

Last year while planning Lil Bug's 1st birthday party, I ran into a problem with my "want" and what I could actually find in the stores at a price I was willing to pay for a party.  Those that know me, know, I love a bargain and if its not something I will use over and over and often...I refuse to pay full price.  I wanted a red tiered serving platter.  I couldn't find one.  Then I saw that you could DIY one and they were all over blog land.  It was perfect timing!  I made my own.


And then I made another....


Fast forward to present...I really needed to organize my jewelry.  I have cubby holes in my closet and one of them houses all my jewelry.  It was a mess.  I wasn't quite sure what I wanted to do until I saw a picture of a tiered jewelry holder and decided I must make one. 
Photo via Better Homes and Gardens

I collected my supplies....3 plates, 2 candlesticks, and glue. 


You will want to turn the candlestick upside down so that the top plate gets the most surface area.
I glued my candlesticks (upside down) to 2 of the plates.  See how there is more surface area on the bottom ring?  Allow to dry for a good hour or so before moving on to next step.


Glue one on top of the other and again, allow to dry for a good hour or so. 


Then glue the last plate to the top. 


I used glass glue but found that super glue (dollar store) works better...its thicker and you can get more on the tiny rim of the candlestick. 


Related Posts Plugin for WordPress, Blogger...